Gradle是一个好用的构建工具 ,使用它的原因是:
配置相关依赖代码量少,不会像maven一样xml过多
打包编译测试发布都有,而且使用起来方便
利用自定义的任务可以完成自己想要的功能
下载地址http://services.gradle.org/distributions/ ,下载你所需要对应的版本,我这里下载的是gradle-4.7-bin.zip。下载后解压到你想要的目录即可,然后设置环境变量:


在cmd模式下查看,出现以下信息证明安装成功:

然后我们可以在在环境变量里配置gradle默认的仓库地址(和maven不太一样):

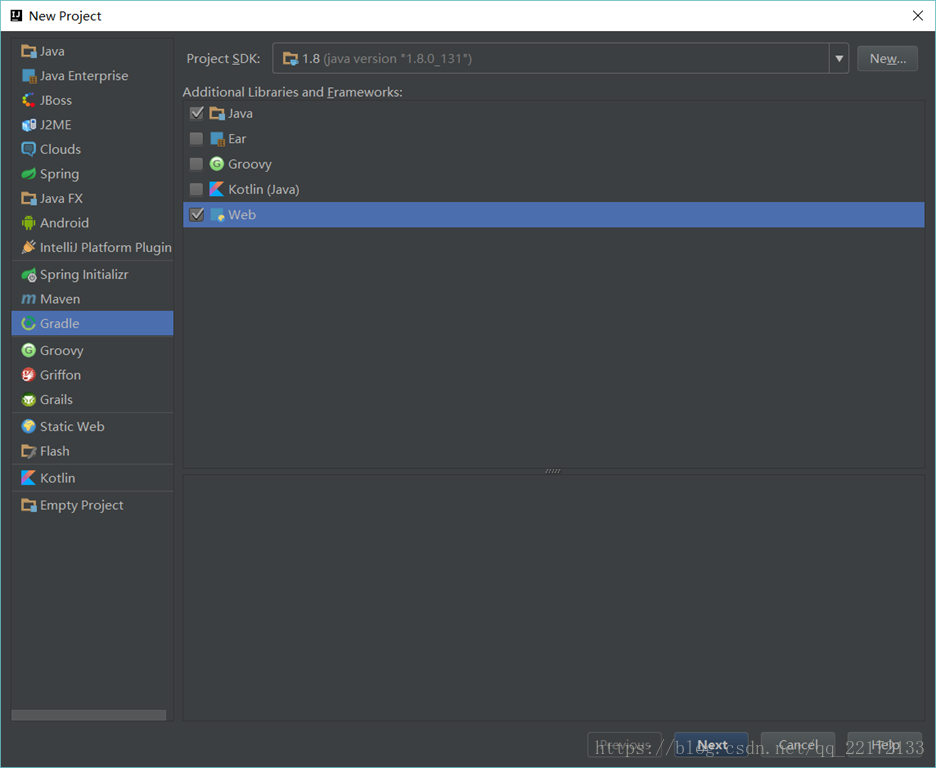
使用idea创建一个web的Gradle项目


然后对项目进行打包运行:

双击war

打包完成之后的war文件会在:

然后把war放入对应的tomcat目录即可,这里就不多解释了。
eclipse中要自己安装插件,插件路径为:
https://download.eclipse.org/buildship/updates/e46/releases/2.x/
1、解释build.gradle和settings.gradle
首先是一个项目包含group、name、version 。settings.gradle是用来管理多项目的,里面包含了项目的name

在build.gradle中,apply是应用的插件,如:

这里我们用了java和war的插件 ,dependencies是用于声明这个项目依赖于哪些jar

这里说明的是,测试编译阶段我们依赖junit的jar。其中包括complile(编译时)runtime(运行时)testCompile(测试编译时)testRuntime(测试运行时)。repositories是一个仓库gradle会根据从上到下的顺序依次去仓库中寻找jar

这里我们默认的是一个maven的中心仓库 ,从gradle源代码中我们看到地址是这样的

这里可以进行配置,其中mavenLocal()表示使用本地maven仓库;mavenCentral()使用maven中心仓库 。使用固定的地址,这里可以使用阿里云
(maven {url 'http://maven.aliyun.com/nexus/content/groups/public/'})
镜像下载速度会快一些,然后也可以使用公司内部的私服地址 。
附加,这里加上一个spring boot的gradle配置文件,可以和maven的构建对比一下
// buildscript 代码块中脚本优先执行

buildscript {

	// ext 用于定义动态属性

	ext {

		springBootVersion = '1.5.2.RELEASE'

	}

	// 自定义  Thymeleaf 和 Thymeleaf Layout Dialect 的版本

	ext['thymeleaf.version'] = '3.0.3.RELEASE'

	ext['thymeleaf-layout-dialect.version'] = '2.2.0'

	// 自定义  Hibernate 的版本

	ext['hibernate.version'] = '5.2.8.Final'

	// 使用了 Maven 的中央仓库(你也可以指定其他仓库)

	repositories {

		//mavenCentral()

		maven {

			url 'http://maven.aliyun.com/nexus/content/groups/public/'

		}

	}

	// 依赖关系

	dependencies {

		// classpath 声明说明了在执行其余的脚本时,ClassLoader 可以使用这些依赖项

		classpath("org.springframework.boot:spring-boot-gradle-plugin:${springBootVersion}")

	}

}

// 使用插件

apply plugin: 'java'

apply plugin: 'eclipse'

apply plugin: 'org.springframework.boot'

// 打包的类型为 jar,并指定了生成的打包的文件名称和版本

jar {

	baseName = 'springboot-test'

	version = '1.0.0'

}

// 指定编译 .java 文件的 JDK 版本

sourceCompatibility = 1.8

// 默认使用了 Maven 的中央仓库。这里改用自定义的镜像库

repositories {

	//mavenCentral()

	maven {

		url 'http://maven.aliyun.com/nexus/content/groups/public/'

	}

}

// 依赖关系

dependencies {

	// 该依赖对于编译发行是必须的

	compile('org.springframework.boot:spring-boot-starter-web')

	// 添加 Thymeleaf 的依赖

	compile('org.springframework.boot:spring-boot-starter-thymeleaf')

	// 添加  Spring Security 依赖

	compile('org.springframework.boot:spring-boot-starter-security')

	// 添加 Spring Boot 开发工具依赖

 	//compile("org.springframework.boot:spring-boot-devtools")

	// 添加 Spring Data JPA 的依赖

	compile('org.springframework.boot:spring-boot-starter-data-jpa')

	// 添加 MySQL连接驱动 的依赖

	compile('mysql:mysql-connector-java:6.0.5')

	// 添加   Thymeleaf Spring Security 依赖,与 Thymeleaf 版本一致都是 3.x

	compile('org.thymeleaf.extras:thymeleaf-extras-springsecurity4:3.0.2.RELEASE')

	// 添加  Apache Commons Lang 依赖

	compile('org.apache.commons:commons-lang3:3.5')

	// 该依赖对于编译测试是必须的,默认包含编译产品依赖和编译时依

	testCompile('org.springframework.boot:spring-boot-starter-test')

}