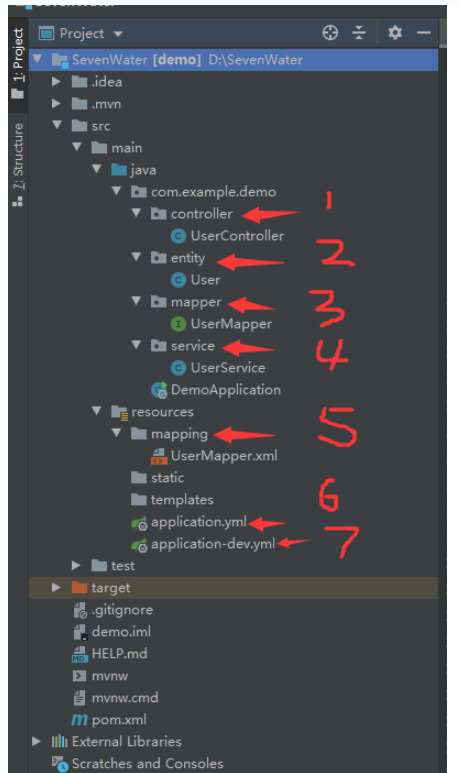
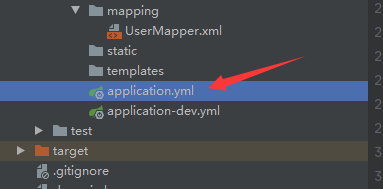
根据上图所示,idea中我们有7个比较重要的模块需要建立
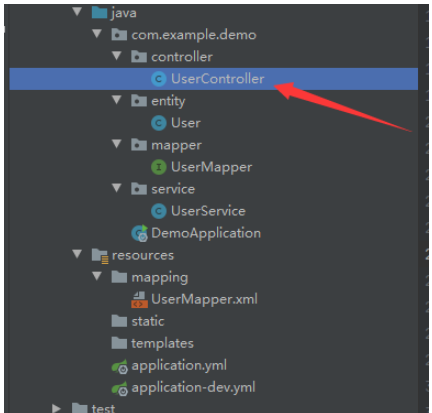
(1)controller包:如果学习过或者对SpringMVC有所了解的小伙伴,肯定知道,controller是控制层,相当于我们的接收浏览器信息并响应发送相关信息的地方,具体的还结合计算机网络相关知识,了解在浏览器中如何接收信息,并如何响应信息,在controller控制层下我们实现相关数据操纵(此处特别鸣谢我研究生生涯阶段的师兄给我讲解了很久关于Web编程方面的知识,收益良多。希望大家利用相关时间,多去查询资料和相关视频进行学习);
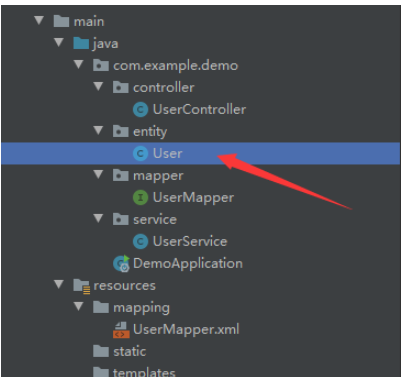
(2)entity包:这里存放我们的实体类,跟单纯学java里面建立类一模一样,没有区别;
(3)mapper包:SpringMVC中称之为持久层也就是(DAO层(数据访问对象)),这里可以直接对数据库进行操作,一般与第五个包mapping包连用;
(4)service包:SpringMVC中称之为业务逻辑层,所以这里存放的类都是处理相关的业务逻辑;
(5)mapping包:放在resources下面作为classpath,存放的mybatis文件,因为现在的SpringBoot集成性很强,把很多配置文件都可以放在一块,哪怕是没有太多的mybatis基础的小伙伴也可以进行学习。之所以说mapper包与mapping包是一起连用,是因为它们形成映射关系,它们两的结合使用来访问我们的数据库文件;
(6)application.yml:作为全局默认配置文件,适用于整个项目,要整合我们这么多的配置信息,这个配置文件肯定少不了(此处最好是使用yaml语言编写配置文件,因为编写相对而言简单明朗一些);
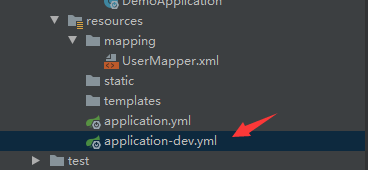
(7)application-dev.yml:这个算是具体某个环境的配置文件,具体要结合我们的实际项目。因为项目本身不只是开发环境,还有测试、生产等一系列环境。当我们做开发是用开发的环境配置application-dev.yml,当我们做测试的时候用测试的环境配置application-test.yml,当我们做生产的时候用的是生产的环境配置application-pro.yml。目前我们暂时只说开发环境,所以就只用到了一个配置文件application-dev.yml。具体的某个环境配置信息在使用时会覆盖applicaiton.yml的默认配置,所以,不用担心默认配置中的语句与环境配置中的语句发生冲突。
每个java程序都有程序入口,DemoApplication本身在我们初始化SpringBoot时就已经存在了,我们在这里不需要做过多的配置。

package com.example.demo;


import org.mybatis.spring.annotation.MapperScan;

import org.springframework.boot.SpringApplication;

import org.springframework.boot.autoconfigure.SpringBootApplication;


@MapperScan("com.example.demo.mapper")

@SpringBootApplication

public class DemoApplication {


    public static void main(String[] args) {

        SpringApplication.run(DemoApplication.class, args);

    }

}
●@SpringBootApplication注解:是用来表示这是一个springboot项目的启动项类,目的是开启自动配置(其实它是继承于Configuration配置类,深解需要大家去剖析SpringBoot的原理)
●@MapperScan(“com.example.demo.mapper”)是为了扫描我们的mapper文件,进行有效访问相关数据库文件URL映射(这个注解的作用很大!)
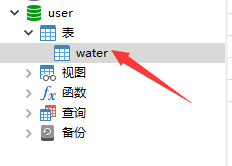

●相应的sql创建表语句如下所示:
CREATE TABLE `water` (

  `id` int NOT NULL,

  `name` varchar(255) COLLATE utf8_unicode_ci NOT NULL,

  `salary` double(10,2) NOT NULL,

  PRIMARY KEY (`id`)

) ENGINE=InnoDB DEFAULT CHARSET=utf8mb3 COLLATE=utf8_unicode_ci;
package com.example.demo.entity;


/**

 * @description:    实体类

 * @author: Fish_Vast

 * @Date: 2021/8/25

 * @version: 1.0

 */

public class User {

    private String name;

    private Integer id;

    private Double salary;


    public User() {

    }


    public String getName() {

        return name;

    }


    public void setName(String name) {

        this.name = name;

    }


    public Integer getId() {

        return id;

    }


    public void setId(Integer id) {

        this.id = id;

    }


    public Double getSalary() {

        return salary;

    }


    public void setSalary(Double salary) {

        this.salary = salary;

    }


    @Override

    public String toString() {

        return "User{" +

                "name='" + name + '\'' +

                ", id=" + id +

                ", salary=" + salary +

                '}';

    }

}
●这里想必大家不会陌生,这是纯Java基础都能编写出来的类,建立三个私有属性,一个空参构造器,相应的get、set方法,还重写了一个toString()方法。这里值得注意的点是在声明属性时,最好是使用包装类进行声明。
●在Java中跟mybatis相关的读取与录入,为何尽量使用包装类而不使用基本数据类型呢?
①在MySQL中没有给字段赋值默认为null,当你从数据库中查出来也是null,如果该字段在对应的Java代码中是int类型,null不能对应int类型,因为int代表的是基本数据类型,只能是基本的数字。
②实体类的属性可以给它赋值也可以不给它赋值,当你不给它赋值时,它拥有默认值,比如int的默认值就为0。但是主动为它设置值为0与它默认为0是两个不同的概念。比如,一个班的成绩:0代表某学生分数为0,而null代表这个学生该门考试没有成绩,这是两个不同的概念。

package com.example.demo.mapper;


import com.example.demo.entity.User;

import org.springframework.stereotype.Repository;


import java.util.List;


@Repository

public interface UserMapper {

    //1.通过id查询用户信息

    User getUser(int id);

    //2.通过id删除用户信息

    int delete(int id);

    //3.更改用户信息

    int update(User user);

    //4.插入用户信息

    int save(User user);

    //5.查询所有用户信息

    List<User> selectAll();

}
●@Repository,注解它本身的作用便是标注数据访问组件,作为DAO对象,它将 DAO 导入 IoC 容器,并使未经检查的异常有资格转换为 Spring DataAccessException。通过这个注解能够报出更多发现不了的错误,更有利于对项目的维护和开发。其实@Repository不在接口上进行注明,我们的程序照样可以运行,因为在我们使用@MapperScan的时候,我们已经将我们的接口交给框架中的代理类,所以即便是我们不写,程序不会报错,只是我们在Service层写明接口的时候,IDEA会给出红色的波浪线。可以这样理解,标注@Repository是为了告诉编译器我将接口注入到了IoC容器了,你不要报错啦~
●相应地,写出增删查改和查询全部信息的五个方法。
<?xml version="1.0" encoding="UTF-8"?>

<!DOCTYPE mapper PUBLIC "-//mybatis.org//DTD Mapper 3.0//EN" "http://mybatis.org/dtd/mybatis-3-mapper.dtd">

<mapper namespace="com.example.demo.mapper.UserMapper">

    <resultMap id="BaseResultMap" type="com.example.demo.entity.User">

        <result column="id" jdbcType="INTEGER" property="id" />

        <result column="name" jdbcType="VARCHAR" property="name" />

        <result column="salary" jdbcType="DOUBLE" property="salary" />

    </resultMap>

    <!--查询用户信息-->

    <select id="getUser" resultType="com.example.demo.entity.User">

        select * from water where id = #{id}

    </select>

    <!--删除用户信息-->

    <delete id="delete" parameterType="int">

        delete from water where id=#{id}

    </delete>

    <!--返回所有用户信息-->

    <select id="selectAll"  resultType="com.example.demo.entity.User">

        select * from water

    </select>


    <!--增加用户信息-->

    <insert id="save" parameterType="com.example.demo.entity.User" >

        insert into water

        <trim prefix="(" suffix=")" suffixOverrides="," >

            <if test="id != null" >

                id,

            </if>

            <if test="name != null" >

                name,

            </if>

            <if test="salary != null" >

                salary,

            </if>

        </trim>

        <trim prefix="values (" suffix=")" suffixOverrides="," >

            <if test="id != null" >

                #{id,jdbcType=INTEGER},

            </if>

            <if test="name != null" >

                #{name,jdbcType=VARCHAR},

            </if>

            <if test="salary != null" >

                #{salary,jdbcType=DOUBLE},

            </if>

        </trim>

    </insert>


    <!--根据id更改用户信息-->

    <update id="update" parameterType="com.example.demo.entity.User">

        update water

        <set >

            <if test="name != null" >

                name = #{name,jdbcType=VARCHAR},

            </if>

            <if test="salary != null" >

                salary = #{salary,jdbcType=DOUBLE},

            </if>

        </set>

        where id = #{id,jdbcType=INTEGER}

    </update>

</mapper>
●mapper namespace用于绑定mapper接口的,当你的namespace绑定接口后,你可以不用写接口实现类,mybatis会通过该绑定自动帮你找到对应要执行的SQL语句(通过mapper方法名进行绑定);
●resultMap 定义了一个id为BaseResultMap的标识,type代表使用哪种类作为我们所要映射的类;
●<select id="getUser" resultType="com.example.demo.entity.User">在这里中的id = “xxx” ,必须要和mapper接口方法名保持一致,如果不一致,程序会报相应的错误。

package com.example.demo.service;


import com.example.demo.entity.User;

import com.example.demo.mapper.UserMapper;

import org.springframework.beans.factory.annotation.Autowired;

import org.springframework.stereotype.Service;


import java.util.List;


/**

 * @description:	实现类,对进行相关的业务逻辑

 * @author: Fish_Vast

 * @Date: 2021/8/25

 * @version: 1.0

 */

@Service

public class UserService {

    @Autowired

    private UserMapper userMapper;


    public User getUser(int id){

        return userMapper.getUser(id);

    }


    public int delete(int id){

        return userMapper.delete(id);

    }


    public int update(User user){

        return userMapper.update(user);

    }


    public int save(User user){

        return userMapper.save(user);

    }


    public List<User>  selectAll(){

        return userMapper.selectAll();

    }

}
●这里我特别说明一下,private UserMapper userMapper既可以当做是引用数据类型,也可以作为接口对象进行使用,这里我们当接口对象使用(初次接触的时候肯定对这个会有些许疑问,很正常,因为我当时对于这个接口也纠结了很久哦);
●@Service表示我们在业务逻辑层进行操纵,属于自动配置的环节;
●相应的五个方法,通过对象得到相应返回值给UserMapper接口。
package com.example.demo.controller;


import com.example.demo.entity.User;

import com.example.demo.service.UserService;

import org.springframework.beans.factory.annotation.Autowired;

import org.springframework.web.bind.annotation.*;


import javax.xml.ws.Service;

import java.util.List;


/**

 * @description:	控制器,接收并响应相关信息

 * @author: Fish_Vast

 * @Date: 2021/8/25

 * @version: 1.0

 */

@RestController

@RequestMapping("/seven")

public class UserController {

    @Autowired

    private UserService userService;

    //通过id得到用户信息

    @RequestMapping(value = "/getUser/{id}", method = RequestMethod.GET)

    public String getUser(@PathVariable int id){

        return userService.getUser(id).toString();

    }

    //通过id删除用户信息

    @RequestMapping(value = "/delete", method = RequestMethod.GET)

    public String delete(int id){

        int result = userService.delete(id);

        if(result >= 1){

            return "删除成功!";

        }else{

            return "删除失败!";

        }

    }

    //更改用户信息

    @RequestMapping(value = "/update", method = RequestMethod.GET)

    public String update(User user){

        int result = userService.update(user);

        if(result >= 1){

            return "更新成功!";

        }else{

            return "更新失败!";

        }

    }

    //插入用户信息

    @RequestMapping(value = "/insert", method = RequestMethod.GET)

    public int insert(User user){

        return userService.save(user);

    }

    //查询所有用户的信息

    @RequestMapping(value = "/selectAll")

    @ResponseBody   //理解为:单独作为响应体,这里不调用实体类的toString方法

    public List<User>  listUser(){

        return userService.selectAll();

    }

}
●@RestController注解:就表示我们在控制层模块。控制层是作为SpringMVC最重要的一个环节,进行前端请求的处理,转发,重定向,还包括调用Service方法;
●@RequestMapping注解:处理请求和控制器方法之间的映射关系;
●@ResponseBody注解:将返回的数据结构转换为JSON格式响应到浏览器(这里说得比较笼统,只是简单滴给大家说明一下,水平还不够,认识还不深,不到之处还请见谅!);
●更多的注解解释,还需要大家多去学习一下SpringMVC和SpringBoot,这里面会详细地介绍,在这里我只是做了很粗略的说明而已(本人也是正接触不久,正在努力学习当中)。
(8)配置application.yml文件
spring:

  profiles:

    active: dev
●语句很简单,指明我们要使用的开发环境配置文件
#服务器端口配置

server:

  port: 8081


#数据库配置

spring:

  datasource:

    username: 数据库名称

    password: 账号密码

    url: jdbc:mysql://localhost:3306/user?useUnicode=true&characterEncoding=utf-8&nullCatalogMeansCurrent=true&useSSL=true&&serverTimezone=Asia/Shanghai

    driver-class-name: com.mysql.cj.jdbc.Driver


#mybatis配置

mybatis:

  mapper-locations: classpath:mapping/*.xml

  type-aliases-package: com.example.demo.entity


#showSQL

logging:

  level:

    com.example.demo.entity: debug
●在开发配置文件当中,我们配置好我们的服务器端口号、数据库的配置、mybatis的配置和如何展示我们的Sql;
●其中要注意的是,数据库的配置中的username和password使用我们安装MySQL数据库时使用的账号名称和密码,url中的3306/紧跟着我们的数据库名称,如果建立的数据库名称不一致,也需要进行修改。
通过以上9个步骤,我们从第(1)个步骤程序入口处点击运行按钮,在浏览器中输入相应指令即可得到不同的展示信息:(到这一步,大概知道为啥要使用@MapperScan注解了吧,可以直接将扫描到的包文件交到代理类中,SpringBoot就是很人性化的框架!)

①查询操作:http://localhost:8081/seven/getUser/1

②删除操作:http://localhost:8081/seven/delete?id=14

③更改操作:http://localhost:8081/seven/update?id=1&name=小丸子&salary=12000

④插入操作:http://localhost:8081/seven/insert?id=15&name=浩子&salary=13000

⑤查询全部用户信息:http://localhost:8081/seven/selectAll