1,将java项目打成jar包
这里我用到的是maven工具

这里有两个项目,打包完成后一个为demo.jar,另一个为jst.jar
2.准备工具
1.服务器
2.域名(注:经过备案)
3.xshell用于连接服务器
4.winscp(注:视图工具,用于传输jar)
3.将jar包传入服务器

直接拖动即可
3.使用xshell运行jar包
注:(服务器的java环境以及maven环境,各位请自行配置,这里不做描述。)
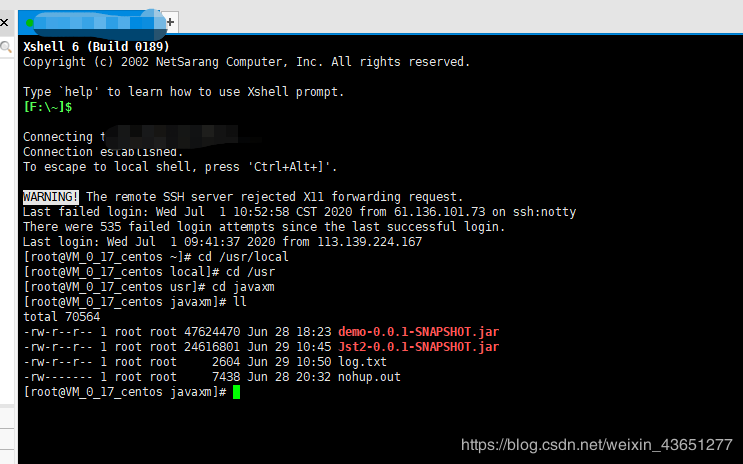
cd到jar包路径下执行:nohup java -jar demo.jar >temp.txt &
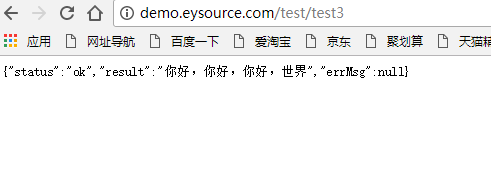
执行启动完两个jar包后使用ip与端口号访问接口
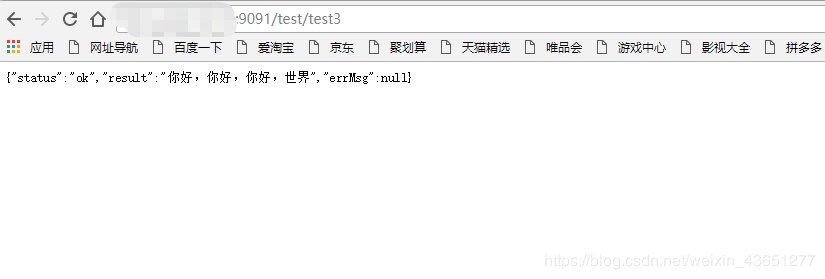
(注:测试接口)
4.下载安装nginx
5.配置nginx.conf
**(注:*********代表服务器地址)
http {

 include  mime.types;

 default_type application/octet-stream;


 #log_format main '$remote_addr - $remote_user [$time_local] "$request" '

 #     '$status $body_bytes_sent "$http_referer" '

 #     '"$http_user_agent" "$http_x_forwarded_for"';


 #access_log logs/access.log main;


 sendfile  on;

 #tcp_nopush  on;


 #keepalive_timeout 0;

 keepalive_timeout 65;


 #gzip on;


 server {

  #监听的端口号

  listen  80;

  #设置访问的二级域名

  server_name demo.eysource.com;


  #charset koi8-r;


  #access_log logs/host.access.log main;


  location /{

  #配置访问的项目路径(注:这里重点)

  proxy_pass http:********:9091/

  # root html;

  # index index.html index.htm;

  proxy_set_header   host $host;

  proxy_set_header x-real-ip $remote_addr;

  proxy_set_header   x-forwarded-for  $proxy_add_x_forwarded_for;

  client_max_body_size 100m;

  root html;

  index index.html index.htm;

   }

  }

 server {

  #监听的端口号

  listen  80;

  #设置访问的二级域名

  server_name aaa.eysource.com;


  #charset koi8-r;


  #access_log logs/host.access.log main;


  location /{

  #配置访问的项目路径(注:这里重点)

  proxy_pass http:********:8080/

  # root html;

  # index index.html index.htm;

  proxy_set_header   host $host;

  proxy_set_header x-real-ip $remote_addr;

  proxy_set_header   x-forwarded-for  $proxy_add_x_forwarded_for;

  client_max_body_size 100m;

  root html;

  index index.html index.htm;

   }

  }

 }
6通过域名访问(成功)